Monday, July 29, 2013

Adventures in QR Land

If you're a tech-savy teacher, you've probably already tried using QR codes in your classroom and had wild success. If you're like me, you've probably just read about these cool "code-things" that other awesome teachers are using and made a mental note to "someday" look into them. Well today is the day to venture into the land of QR codes, where students magically scan a code to monitor their progress on a  specific task or question.

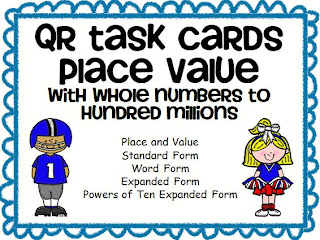
In all seriousness, the QR thing was *MUCH* easier than I had anticipated. Basically it's a bar code that stores data, usually in the form of a link. By now you've probably seen them popping up everywhere from fast food containers to print media. When you generate a QR code, you can input any type of data that you want the smart device to display - a website (in the form of a link), photos, or even text! I choose the text method. After I made my task cards, I simply typed each answer into the text box & http://qrcode.kaywa.com/ generated a QR code. Then I right-clicked on the QR image in my web browser, & copied/pasted it to its matching task card. I even re-sized the QR codes to better fit my cards & *fingers crossed* they all worked.

Since this was my first experience with creating QR codes, I'm not even going to try to pretend that my work is perfect. Seriously. I usually don't like to post goodies until AFTER I've tested them out with my kiddos, but I really feel that this item is something most teachers would want to use in during first unit (which for me is less than a full week into school - have to hit the ground running). Therefore I'm releasing this set of task cards a bit early. Any feedback would be greatly appreciated & I will definitely give an update after I've actually used them in class.

 
Still interested? Click on either picture above & head over to my TPT store. Enjoy!

- Mrs. Wiggin -

Tuesday, July 23, 2013

Number Labels


The label madness has continued! In my last post I shared how I was going through a stage where I wanted to make labels for EVERYTHING. Hence I'm ready to reveal the number labels I've created for my student desks, calculators, and lockers. Why numbers instead of names you ask? Since we're departmentalized I don't really want to put name labels on the desks. Instead, I label each desk with a number. I have three pods/clusters with *hopefully 6* desks in each pod (last year I had 8 desks per pod). The first pod has #1-6, the second #7-12, and the third #13-18. I start the numbering at the same location in each pod and number the desks clockwise. This helps me look at a desk and quickly know what number it is. The desks never move - I simply move the kiddos when I need to rearrange my seating chart.


Numbering the student desks spawned the idea of also numbering my calculators. I've only taught math for 2 years, but I can proudly say that I've the students have NEVER lost a calculator. On days when I know that we will need the calculators (mainly when we're practicing for state assessments) my technology guru (student helper) distributes the calculators during our morning homeroom period. He simply places the calculator on the top left-hand corner of its matching desk. Before each class period ends, I check to ensure that each calculator is still placed on its assigned desk. At the end of the day my tech guru collects the calculators and returns them to the caddy (another favorite DIY). When I moved from teaching second grad to teaching 5th grade math, I really wanted to order one of those nice *expensive* calculator caddies from EAI. Instead I stumbled upon a cheap shoe caddy at Big Lots and hot glued it to the back of a book case. I also laminated/hot glued the matching number cards to each slot and *tada* instant calculator caddy. I'm not completely happy with the edges of the cabinet...I'm contemplating adding the scrunchy border to it!


Here's the best part! I've uploaded these labels to my TPT store as a FREEBIE! Simply click on the picture below to head on over & snag a set for yourself!


- Mrs. Wiggin -


Tuesday, July 16, 2013

Labels, Labels Everywhere

This year I strategically made a plan for my classroom set-up & prep. Our faculty retreat is August 2 with our PD days beginning on August 5. Even though students don't return to the 13th, those PD days are booked up with team meetings, learning activities, & collaboration. Therefore my approach is to get ALL of my set-up completed PRIOR to our PD Days; any extra time I have during those days can be spent on the mental stuff (LESSON PLANNING). First, I focused on the cutesy stuff - curtains, pennats, bows, inspirational signs, etc. - basically all my favorite Pinterest ideas that I've been saving up since last school year. Now I'm working on the physical set-up: rearranging the desks, setting up computers, attaching labels, etc. Once I'm satisfied with the physical appearance I can *hopefully* have some quiet time to work on lesson planning, assembling data binders, & getting all of my back to school documents ready.

Labels

This year I accidently stumbled upon the idea of creating matching labels for almost EVERYTHING in the room ( I say "almost" because I just realized that my desk & calculator numbers are a different design). It began when I created some labels for my school supply bins. Once I attached them to the bins I started thinking about how cute they were & how they would look in different sizes (for other items in the room). Before I knew it, I extended my label theme to almost everything I could possibly put a label on.


These are our library baskets. We have library as a Related Arts class once a week, & our librarian asks that all books be returned first thing in the morning. Last year I just couldn't remember to send the books up to the library - perhaps it was because I didn't have a specific place designated for book collection. This year I spruced up some baskets from the Dollar Tree with ribbon & a larger version of my labels. Fingers crossed that these baskets do the trick!
 

Last year I picked up these 3 trays in the clearance section at Wal-Mart for practically nothing. I use them to help keep my papers organized during each class period. I typically chunk my lesson into multiple activities & used to have a hard time keeping all of the papers sorted. Now I just seperate them in the numbered trays.


I FINALLY got these saved & uploaded to TPT as a FREEBIE! Just click on either picture below to hop on over to my TPT store & download your free copy!


- Mrs. Wiggin -


Teaching Heart Blog

Tuesday, July 9, 2013

Classroom Decor

Despite the fact that I've already published a post for today, I just have to take a moment to share the beginnings of my 2013-2014 classroom decor. I arrived at my classroom a little before noon with the mission of modge podging (is that a word?) the front of my filing cabinets. However I quickly discovered that I purchased the smaller size of scrapbook paper (8.5" x 11") when I should have just purchased the larger squares. Darn it. I didn't want to leave without some type of accomplishment, so I decided to work on my inspirational door signs. I have to claim that I am NOT the original creator of this idea. I found it on Pinterest & just typed the wording myself. Perhaps I'll add this to TPT soon as a FREEBIE? Keep your eyes peeled!
 
Sorry for the huge size - just wanted to make sure that you could read the actual words.


Next up I created my cork board display on the inside of my classroom door. This is something that took all of last year to dream up so along with being cute, I hope it's actually functional. Last year I started using the "pink slips" approach for students who didn't complete their homework. Basically they fill out a slip stating why they didn't complete the assignment & sign/date it. Last year I would tell students to just pile them on my desk. While I could easily keep all of the slips together, I couldn't always remember to check them the next day to see whether those students remembered to bring the assignment. Basically, I wanted somewhere to store the slips where I could see them & quickly track how late (number of days) the assignments were. My vision is for students to fill out the slip & pin it to the cork board using a ladybug pushpin (yes, I seriously have these). When they bring the assignment in (hopefully the next day) they can remove the slip & staple it to the assignment. 


Lastly, I finally hung the party lanterns that I snagged at Hobby Lobby. I knew that I had to be very cautious in hanging anything. I learned this the hard way during my first year of teaching after I tried to hang a windsock from the ceiling; that evening the AC kicked on & just as my windsock started swaying the motion-sensor security system went into panic mode. Luckily I was a newbie & they simply took down the windsock instead of calling me to come do it myself. I hung these beauties close enough to the wall so that they are actually brushing the wall. There isn't an AC vent nearby so hopefully this will keep them from swaying. If needed, I suppose I could easily place a piece of tape on the back of each lantern & stick it to the wall. So far they've been up for 6 hours & no phone call :) I hung them using skinny ribbon & attached a somewhat decent bow to each lantern for embellishment.
 

- Mrs. Wiggin -


Vacation....all I ever wanted!

Long time, no post...

My husband and I just returned from our summer travels. We spent a few days vacationing with my family at Isle of Palms in Charleston before embarking on our 1-year anniversary cruise (YAY). We spent 7 days cruising with Carnival to the Grand Turk, Half Moon Cay, & Nassau. This was my second cruise & I highly recommend those ports - both Grand Turk & Half Moon Cay revolved around the beach. Seriously, where else can you walk off the boat & step directly onto the beach for FREE? We had a blast but as always, it's good to finally be home. Here's a quick glance into our adventures.
    
P.S. My husband had too much fun with the towel folding classes & left the family of swans as a surprise for our steward on the last day!
 

Sold!

I did leave out one tiny detail about our vacation...we accepted an offer on our house the day before leaving port. We've had our home on & off the market for the last few years & had just relisted it when we got the call. The only problem is that we're not exactly sure of our future plans. My husband is a contractor, so we've got several options as far as building or flipping a foreclosure. Fingers crossed that our plans include something with Internet access BEFORE school starts in August :)
 

Whole Brain Teaching Posters

Now that you've read through all my rambling, here's a FREEBIE for your classrooms. Can you believe that our local Wal-Mart already has the school supplies stocked? With that in mind here is a set of posters to go along with the Whole Brain Teaching approach.


These adorable posters feature a polka dot background/trim and fun font! The original set was designed for my red/black/white (ladybug) classroom, but I've also included the following color variations to match the theme of your classroom:

Orange/white
Aqua/white
Purple/white
Lime green/white
Blue/white
Gray/white
 
Still interested? Click on the image above to hop on over to my TPT store. Enjoy!
 

- Mrs. Wiggin -